Make Your Own Wedding Menu Cards
You can make your own wedding menu cards fairly easily by using a simple word document. If you would like more modern fonts and want to add graphics then using an online photo editor is the easiest and cheapest choice.
I like to use PicMonkey and the instructions below will hopefully make you a fan too!
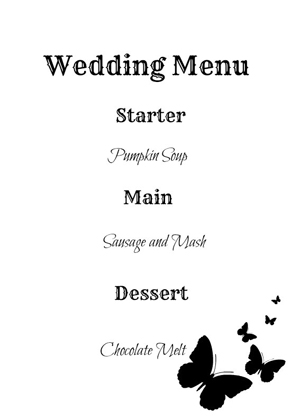
I created this menu using Picmonkey, you can change the color of the fonts and add completely different images to make this your own.
You need to upload an image to PicMonkey to be able to create anything, there is no blank image that you can use from them so I have made a blank image that is letter size for you that you can then upload yourself.
Step 1: Save this blank image to your computer and then go to PicMonkey where you will upload the blank image and then you are ready to add your graphics and text.
Step 2:
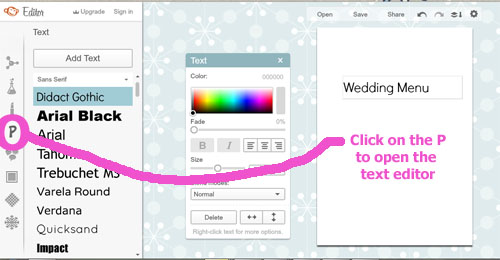
Add the text by clicking on the "P" button, you can change the size and the font by using the tools in the box. You can change the color and the font size. To change the font you need to select a different font on the left hand side menu, you will need to highlight what you have written first.
I found it easier to add each line separately as I then had more flexibility to change the layout. Plus I wanted different fonts through the menu.
Step 3:
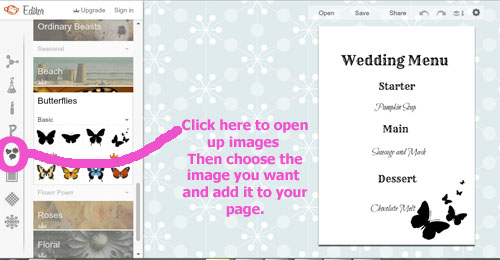
Add images by clicking on the heart and speech button icon on the far left of the screen. Then scroll down to choose the type of image that you want. The images with the crown are ones you have to pay for, but there are lots of free ones!
Step 4: When you are happy with your menu press the save icon and save it to your computer. Then you can print it off!
As an Amazon Associate I earn from qualifying purchases.
Other links on this site may lead to other companies that I'm associated with and this is how I can keep this site going and save you money on your wedding.
